
With Nexus Dashboard 4.3(1) comes the ability to utilise it’s MCP server. I have previous pages discussing and demonstrating the capabilities found within Cloud Control which is a SaaS based platform. Cloud Control uses the MCP servers within Cisco products to allow communication from Cloud Control to each domain using the AI Assistant and subsequently AI Canvas.
The MCP server in Nexus Dashboard like any other MCP server can be utilised by other tools outside of Cloud Control. So for those of us wondering how we can utilise AI assistance and start creating our agentic operations pipelines when our business won’t allow the use of a SaaS based platform, i’ll be demonstrating how in this page.
The Tools & Connectivity
To start i’ll highlight which tools i’m using during this process. These tools are as follows:
- Nexus Dashboard 4.3(1)
- Cisco Secure Client (VPN)
- Claude Pro Desktop Application
To connect to my Nexus Dashboard 4.3(1) which is deployed virtually in a different country to the one I reside in I have to utilise my Cisco Secure Client (VPN). It’s key to note the point that a VPN is in use because this will impact the way we configure our connectors within the Claude Pro Desktop Application.
The Steps
- Create API key within Nexus Dashboard
- Configure local MCP connector within Claude Pro
- Test prompts within Claude Pro
Configure API Keys
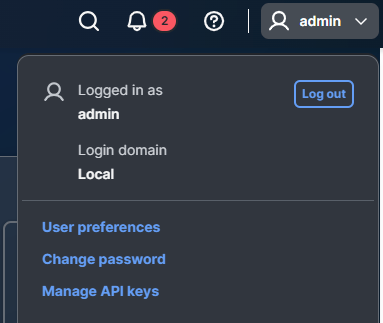
Login to the Nexus Dashboard UI, select your username top right followed by “Manage API keys”
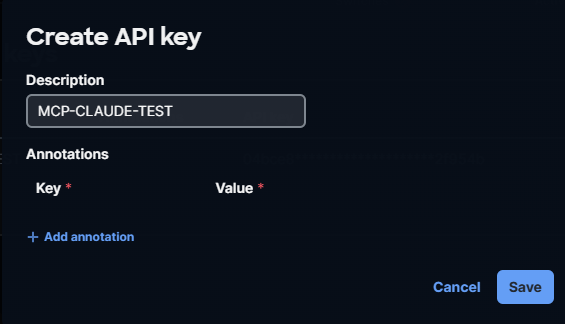
We can now add an API key, descript it appropriately and click save. This will automatically create the API key we can utilise. It’s key to note here that this is a lab and i’m not discussing API security which should absolutely be taken into account in production environments. Theres much more sensible and secure ways of configuring API keys than just clicking save.
Once we’ve clicked save we can check and copy our API key.
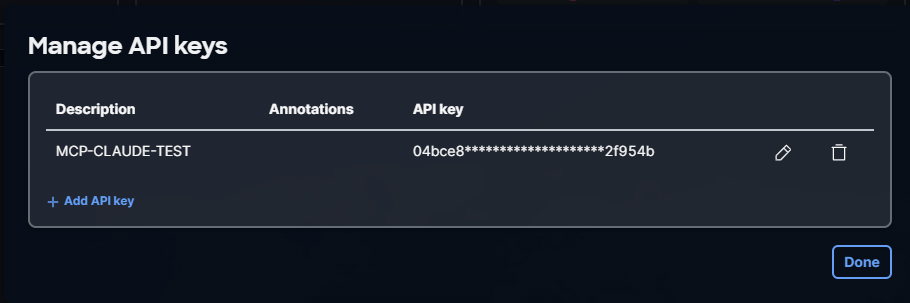
That’s it, our Nexus Dashboard MCP server can now be connected to and tools confirmed via the API key configured.
Claude Pro
I am using the Claude Pro desktop application to poll the MCP server for information about my Nexus Dashboard. To do this we must first create a connector for Claude to connect to my Nexus Dashboards MCP Server.
Within our Claude Pro Desktop application we can select settings | connectors | +Add
This will allow us to create a new custom connector.
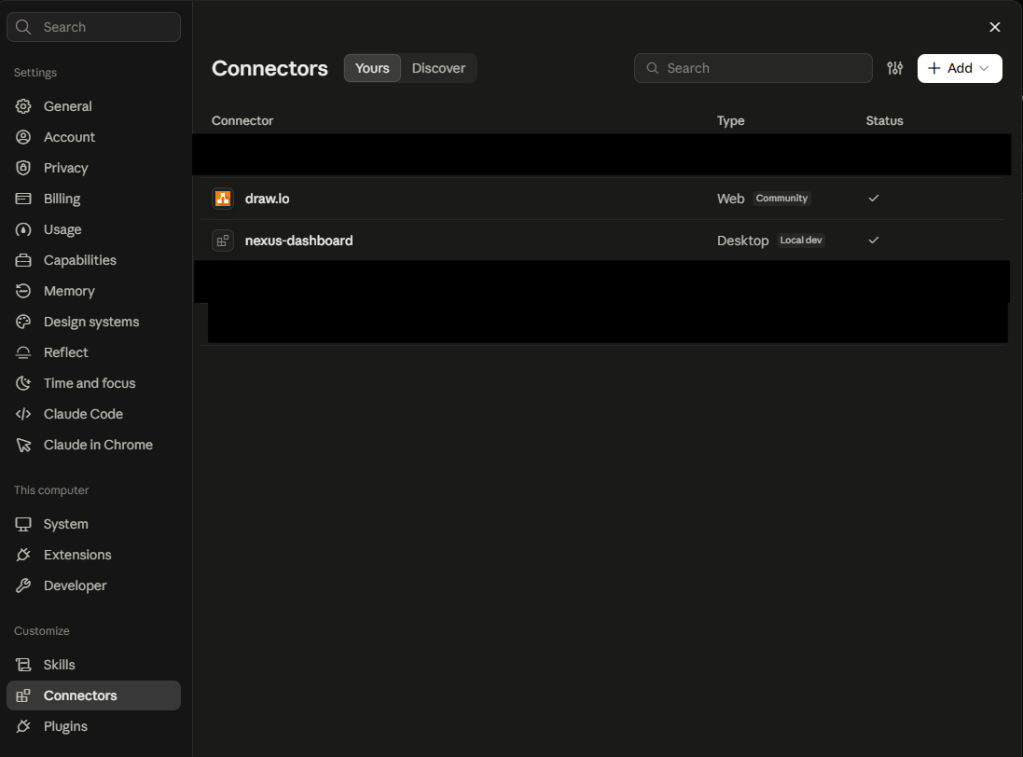
This custom connector is great for adding MCP servers which are available on the internet for example the draw.io MCP is Type Web and can be connected to from Claudes Cloud.
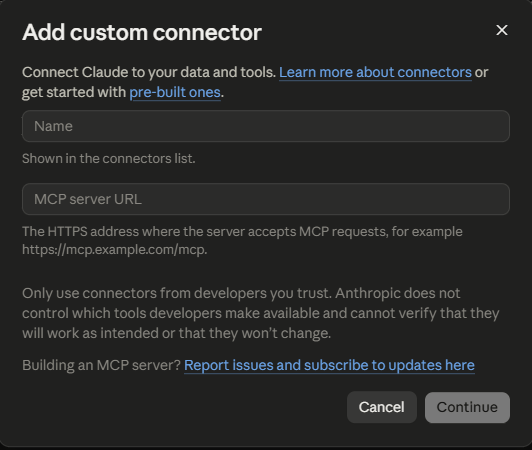
The main issue here is that we’re trying to connect to our Nexus Dashboard MCP which is not available on the internet it is available from our machine over our VPN privately. This means we must add a Type Desktop (Local dev) connector.
To create the Local dev connector for our Nexus Dashboard MCP server we must edit our Claude config file. My claude_desktop_config.json was found at the following path.
C:\Users\myuser\AppData\Local\Packages\Claude_xxxxxxxxx\LocalCache\Roaming\Claude\claude_desktop_config.json
The following configuration is added to the end of the file. We can add multiple local dev connectors in this way, one after the other.
  "coworkUserFilesPath": "C:\\Users\\myuser\\Claude",
  "mcpServers": {
    "nexus-dashboard": {
      "command": "npx",
      "args": [
        "-y",
        "mcp-remote",
        "https://X.X.X.X/api/v1/mcp",
        "--transport",
        "http-only",
        "--header",
        "X-Nd-Apikey:THISISMYAPIKEYFROMNEXUSDASHBOARD",
        "--header",
        "X-Nd-Username:admin"
      ],
      "env": {
        "NODE_TLS_REJECT_UNAUTHORIZED": "0"
      }
    }
  }
}
The main lines to consider here are:
The API Key we created in Nexus Dashboard *Security note, again there are better ways of securing API Keys, this is a lab:
"X-Nd-Apikey:THISISMYAPIKEYFROMNEXUSDASHBOARD",
The Username we use to access Nexus Dashboard (Claude will use the RBAC assigned to this user. If it’s read-only then so is Claude).
"X-Nd-Username:admin"
Certificates must be considered also, as i’m using a lab i’ve bypassed TLS certificates. Again not recommended outside of a lab environment.
"env": { "NODE_TLS_REJECT_UNAUTHORIZED": "0"
The address we access our Nexus Dashboard on
"https://X.X.X.X/api/v1/mcp"
Once we have configured these settings in our claude_desktop_config.json file we can save the file and restart our Claude desktop application. You have to restart the application completely, close it in system tray too or the connector will not work.
To add if we drop our connectivity to our VPN at any point we will need to restart our Claude desktop application to regain connectivity to our Nexus Dashboard MCP.
The connector will be configured under connectors as follows:
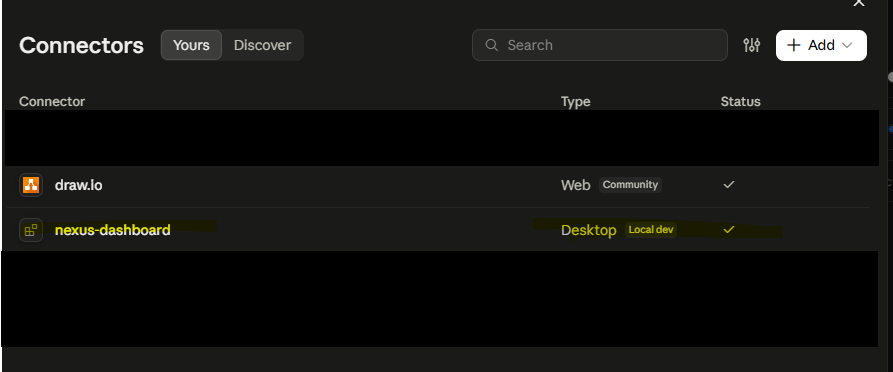
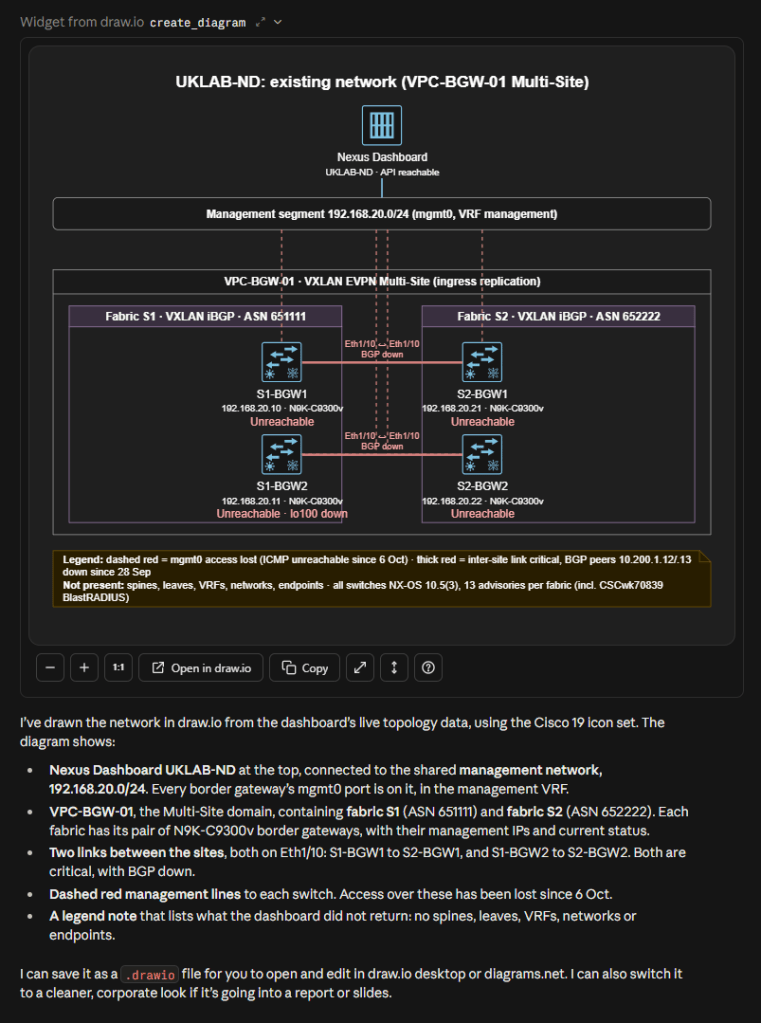
Note i’ve also added draw.io, this comes in handy for requesting editable diagrams of our networks, this is demonstrated next.
Testing
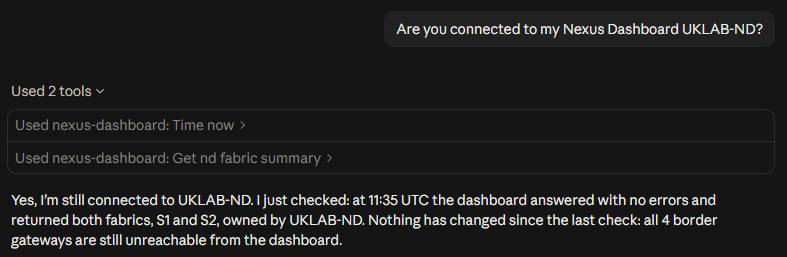
Now we’ve confirmed our connector is configured we can ask Claude to check the status of our Nexus Dashboard.
The prompt: “Are you connected to my Nexus Dashboard UKLAB-ND”
Note with this response we can check which tools on the MCP server have been utilised.
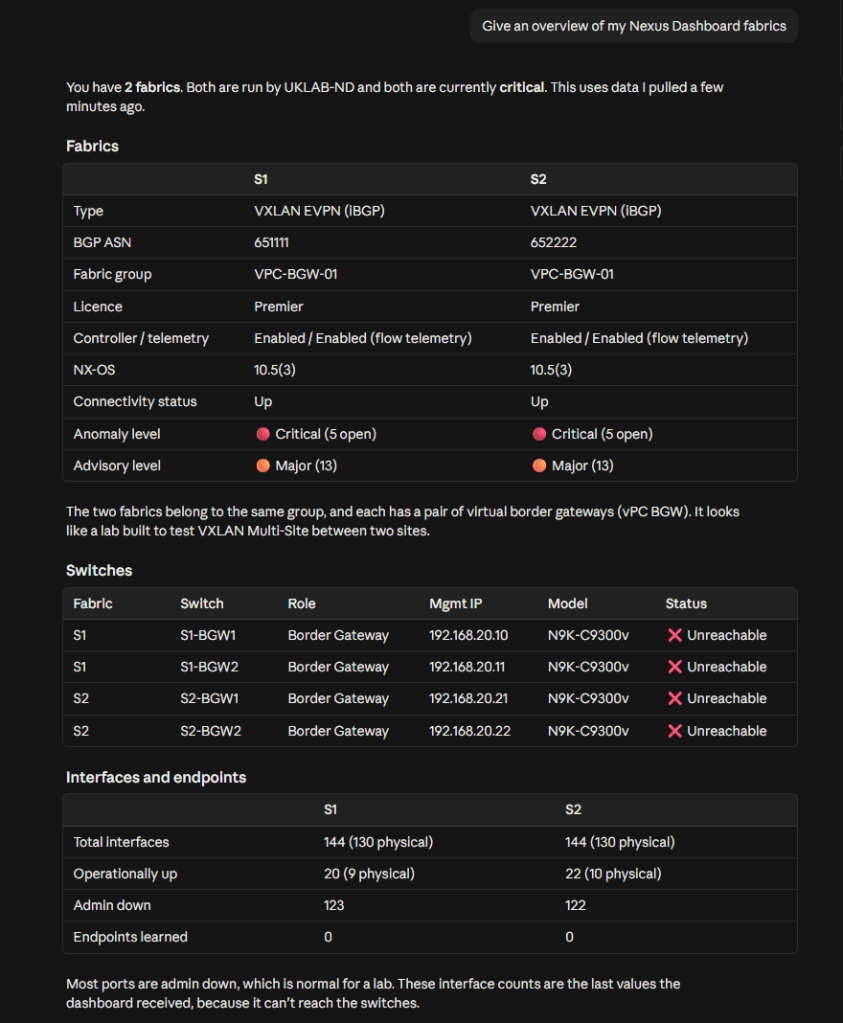
The prompt: “Give an overview of my Nexus Dashboard fabrics”
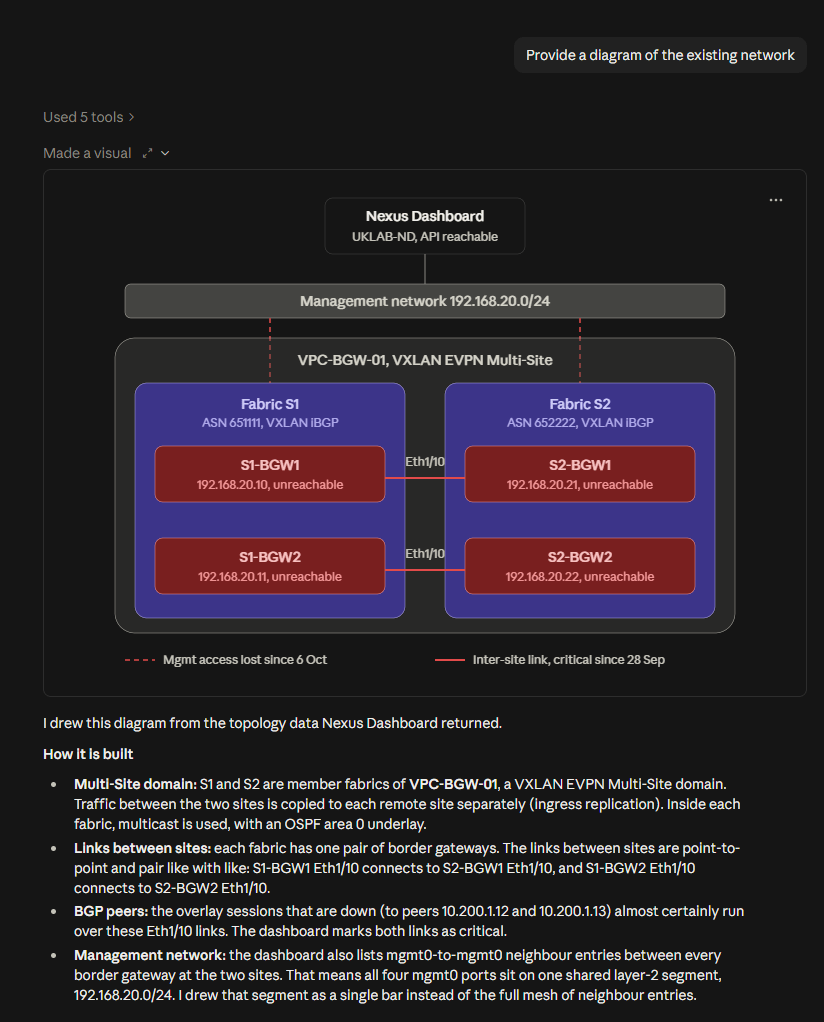
Next prompt to create a network diagram
The prompt: “Provide a diagram of the existing network”
Next prompt to create an editable network diagram using a different MCP connector
The prompt: “Provide a diagram of the existing network with draw.io”
And that’s it, pretty straight forward to start using the MCP servers integrated into Cisco products using Claude Pro. The limitations are based on the tools available within the MCP servers. For example we cannot push configuration to Nexus Dashboard in this way.
As you can see my Nexus Dashboard isn’t very healthy currently so i’d best get back to fixing it! Thank you for reading.

